Trusted North Shore Tilers for Bathrooms, Floors & Waterproofing
Serving North Shore with expert bathroom tiling, kitchen splashbacks,
and PS3-certified waterproofing
Local Tiling Experts You Can Trust
We’re a family-run tiling company based in Mairangi Bay, North Shore, providing expert tiling services across Albany, Takapuna, Glenfield, Browns Bay and beyond. Whether you’re looking for bathroom tiling, kitchen splashbacks, outdoor tiling, or certified waterproofing (PS3), we handle everything ourselves — no subcontractors. Our local team brings reliable, high-quality tile installation to every North Shore home.
Modern Bathroom with Walk-in Shower & Porcelain Tiling in Browns Bay

Fully tiled modern bathroom in Browns Bay with a walk-in shower, underfloor heating, and premium porcelain tiles - designed for comfort, style, and durability.
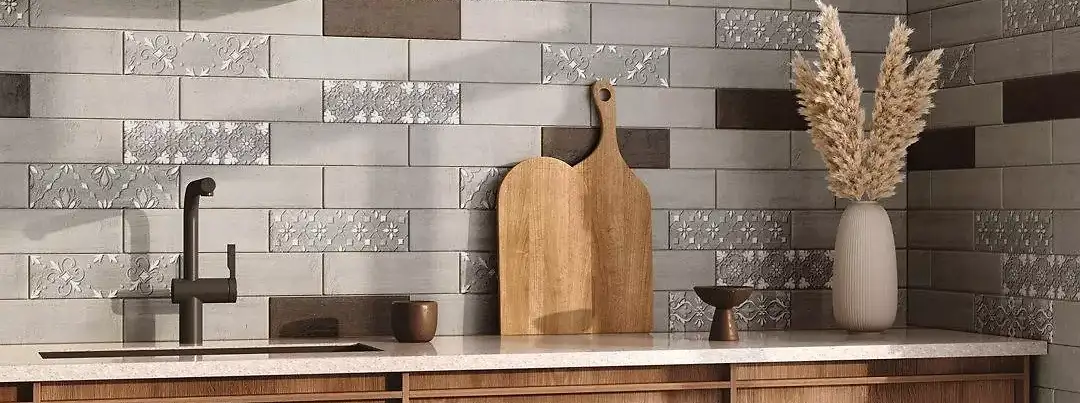
Kitchen Splashback Tiled with matt Hexagon Mosaic Tiles in Birkenhead

Creative kitchen splashback tiled with hexagon mosaic tiles, bringing a unique and stylish touch to this Birkenhead home.
Floor Tiled with Stone-Patterned Dark Grey Porcelain Tiles in Long Bay

Living room floor in Long Bay tiled with large-format, stone-patterned dark grey porcelain tiles - durable and easy to maintain.
Fully tiled shower in calm beige colours with large textured wall tiles in Greenhithe

Fully tiled raised walk-in shower with a threshold and large-format textured porcelain wall tiles - project in Greenhithe by Direct Tiling
Our Tiling Services in North Shore


Outdoor & Exterior Tiling
Enhance your outdoor spaces with durable and stylish tiling. We install exterior tiles that are weather-resistant and built to last in New Zealand’s climate:
✔ Tiling for patios, porches, entrances, swimming pools, and garden paths
✔ Heavy-duty porcelain tiles and natural stone options
✔ Slip-resistant finishes for safety in wet conditions
✔ Screeding and leveling for proper drainage
✔ Tile installation on deck jacks or concrete base
✔ Ideal for BBQ areas, pool surroundings, and steps
We ensure proper preparation and use high-quality materials so your outdoor areas stay beautiful and functional for years.

Interior Floor Tiling
We tile all types of indoor floors — from bathrooms and kitchens to laundries, living rooms, and hallways. Our services cover:
✔ Ceramic and porcelain tiles in any size and pattern
✔ Stone-look and terrazzo-style tiles for modern interiors
✔ Mosaic tiling for unique and intricate designs
✔ Tile layout planning and precise installation
✔ Installation over tile underlay and self-levelling screed
✔ Underfloor heating compatibility for warm, comfortable floors
Whether it’s a full bathroom renovation or replacing old flooring, we bring quality craftsmanship and attention to detail to every job.

Wall Tiling & Splashback
From bathroom and laundry walls to kitchen splashbacks and decorative features — we deliver flawless wall tiling with precision, style, and functionality.
We work with a wide range of tile types and layouts to bring your vision to life:
✔ Classic and creative layouts – from standard subway bricks to advanced patterns like herringbone, chevron, vertical stack, and hexagon
✔ Large-format 3D wall tiles – perfectly aligned to create a seamless visual flow and modern effect
✔ Precision work around kitchen elements – including tight corners, curved extractor fans, and wall-mounted cabinets
✔ Splashbacks that stand out – ideal for kitchens and bathrooms, combining beauty and practicality
✔ Perfect corner finishes – external wall angles tiled with either mitred 45° joints or clean aluminium tile trims, depending on your preference
✔ Mixed-format tiling – combining different tile sizes or adding mosaic inserts between large tiles for a custom feature
✔ High-grip adhesives and quality grouting – to ensure your wall tiles stay put, even in humid or high-use areas
We help you choose the best tile type and layout for your space and deliver a clean, symmetrical, long-lasting finish — every time.

Certified Waterproofing with PS3 Documentation
We are certified waterproofing applicators, approved by Auckland Council and qualified to provide Producer Statements (PS3) to support your building consent. Whether you're renovating a bathroom or building new, we offer compliant, council-approved waterproofing solutions across North Shore.
What We Waterproof:
We apply long-lasting waterproofing membranes to a wide range of surfaces, including:
- Bathroom floors with 100mm wall upstand
- Shower trays and walls of walk-in showers
- Walls behind vanities and washbasins
- Wet area walls surrounding bathtubs
- Laundry and toilet floors
- Balconies and exterior wet zones (on request)
All membranes we use comply with AS/NZ 4858 standards and are tested for durability, flexibility, and moisture resistance.
Our Waterproofing Process – 4 Key Steps
1. Surface Preparation
We make sure the substrate is solid, clean, dry, and properly installed. If needed, we screed and level the surface before application.
2. Priming
A suitable primer is applied to enhance membrane adhesion and prevent issues like peeling or blistering. This step is essential for durability.
3. Joint Sealing & Bond Breaker Application
We reinforce all corners, wall-to-floor joints, and pipe penetrations using bond breakers, sealant, and preformed corner tapes. This allows natural building movement without causing cracks or leaks.
4. Membrane Application – Two Coats
We apply two even coats of Class 3 polyurethane waterproofing membrane, ensuring correct thickness as per manufacturer guidelines. Each coat is carefully brushed or rolled for a uniform, high-coverage finish.
All waterproofing jobs come with:
- 15-year product warranty (membrane)
- 5-year workmanship warranty
- PS3 Producer Statement (on request) for Council approval
- Moisture-proof base for tiling and long-term durability
- Seamless finish ready for further renovation or inspection
Looking for a waterproofing team in North Shore you can trust?
We’re local, family-owned, and detail-focused - making sure your shower, bathroom, or laundry is watertight, code-compliant, and built to last.

Fully Tiled Showers – Built for Durability & Style
We specialise in building fully tiled walk-in showers across North Shore. Our service includes everything: from custom shower tray construction and screeding to waterproofing, precise tiling, and recessed niches - all tailored to your bathroom layout and your style.
Whether you want a curbless walk-in shower or a shower base with a custom threshold, our team ensures a long-lasting, water-resistant finish that meets New Zealand Building Code requirements and is built to last.
Step-by-Step Shower Construction
Our process combines technical expertise with attention to detail. Here's how we build a professional, council-compliant tiled shower:
Step 1: Shower Tray Construction & Screeding
We create the shower base from scratch, forming the proper slope to direct water to the drain efficiently. You can choose between:
- A walk-in shower (no threshold) for a modern, seamless look, or
- A shower tray with a threshold — we install raised curbs as needed for better water containment.
Step 2: Waterproofing the Shower Area
We apply a two-layer waterproofing system that meets AS/NZ standards, ensuring full protection of:
- The shower floor
- All walls up to 1.8m or higher
- Recessed shelves and corners
- Waterproofing is essential for building consent and long-term durability.
Step 3: Floor Tiling & Proper Overlap
We tile the shower floor first, including the full bathroom floor, ensuring proper slope and drainage. This method allows wall tiles to sit over the floor tiles, providing a watertight edge and a clean, professional finish.
Step 4: Wall Tiling with Optional Niches
We tile all shower walls, including recessed shelves (niches) for storage. We use laser leveling and clean alignment to create a seamless, symmetrical finish — even with large-format or textured tiles.
Step 5: Grouting – Epoxy or Standard
We grout the shower walls and floor using either:
- Standard cement grout, or
- Epoxy grout (recommended for shower floors) for extra moisture resistance, reduced mold growth, and easier maintenance. Learn more about grout options
Step 6: Silicone Sealing
All internal corners are sealed with high-quality silicone to prevent water from penetrating behind tiles.
Important: Silicone is applied only after grout fully dries, which prevents cracking and ensures long-lasting flexibility and adhesion.
A professionally built tiled shower not only looks amazing - it protects your home from costly leaks and adds real value to your property.

Underfloor Heating Installation – Warmth You Can Feel
Enjoy warm floors and a more comfortable home with our professional underfloor heating installation service in North Shore. We work with high-quality New Zealand-approved systems that are safe, energy-efficient, and designed to suit your bathroom, kitchen, or living areas.
Our installation includes everything you need: heating cable, advanced thermostat, and self-leveling compound - all handled by trained installers who understand local standards and safety requirements.
Step-by-Step Installation Process
We follow a strict and reliable process to ensure long-lasting and safe underfloor heating:
Step 1: Waterproofing First
Underfloor heating is always installed after the waterproofing is fully completed and cured. This protects the wiring and ensures compliance with building standards - especially in wet areas like bathrooms or laundries.
Step 2: Laying the Heating Cable
We lay the electric heating cable precisely across the floor area, ensuring even heat distribution. The layout is designed to avoid fixtures and furniture while maximizing coverage.
Step 3: Cable Testing
Before pouring any compound, we use a special testing device to verify the cable’s integrity and resistance. This critical step ensures there is no damage or defect in the cable - giving you full peace of mind.
Step 4: Applying Self-Levelling Compound
Once tested, the entire floor is covered with a self-levelling compound, which:
- Protects the heating cable
- Creates a perfectly smooth surface for tiling, and
- Ensures efficient heat transfer through the tile layer.
This step is essential for the durability and performance of the heating system
Step 5: Connecting the Thermostat
Our systems come with a high-tech Colour Touch Screen Thermostat (TH05), which features:
✅ Fast, responsive colour interface
✅ Easy-to-use 7-day programmable schedule
✅ Wi-Fi control via the TH05 app
✅ Energy usage tracking & predictive heating
✅ Option to upload your own photo to customize the screen
This smart thermostat is user-friendly and built to help reduce energy costs while keeping your home cozy.
We only use trusted brands like Warmfloor, specially designed for New Zealand conditions. With professional installation, your underfloor heating will serve you reliably for years.

Tile Repairs & Regrouting
Restore and refresh your tiled surfaces with our professional tile repair and regrouting services — designed to extend the life of your tiles, improve their appearance, and enhance water resistance.
We provide::
✔ Careful tile removal – we safely remove cracked, chipped, or outdated tiles without damaging the surrounding area;
✔ Tile replacement – new tiles are precisely installed to match existing patterns, ensuring a seamless and consistent finish;
✔ Fixing loose tiles – we re-adhere loose tiles to restore stability and prevent further damage to walls or floors;
✔ Regrouting – old or discolored grout is removed and replaced with fresh, clean grout to improve both looks and hygiene;
✔ Epoxy grout upgrade – for wet areas like showers, we recommend epoxy grout, which is more resistant to water, stains, and mold;
✔ Sealing – we seal newly grouted areas to further protect against moisture and keep surfaces easier to clean
Whether it’s a single tile or an entire wall or floor section, we bring attention to detail and reliable craftsmanship to every repair - giving your tiled areas a fresh, long-lasting result.